Pricing
Go to app
User Name
E-mail
Upgrade Help Center

Understanding Chat assignment

Jacob Firuta
5 min read
updated: Sep 12, 2023

Chats are assigned according to a few simple rules. They can be automatically assigned to agents or they can go to a queue from which they are picked up. You can set this in Chat assignment settings.

Automatic chat assignmentLink icon

Each new chat goes to the first available agent with the Accept chats status on. When all agents have one chat each, the next round will be distributed. It will go on until the concurrent chat limit of all the agents accepting chats at the time is reached.

You can set a limit to the number of chats your agents can have at a time by editing agent profile.

Chats from returning customersLink icon

Chats from returning customers are an exception to this rule. They go to the agent that has previously chatted with the customer if this agent is accepting chats.

Automatic chat transfersLink icon

A chat will be automatically transferred to another available agent if the first assignee doesn’t respond for some time. This time period can be adjusted in inactivity timeouts section in Team and Business plans. For Starter this timeout is set to 3 minutes and cannot be customized.

When an agent loses connection or closes the application chats will also be distributed to the available agents.

Chats can be transferred to all agents, even those with the Not accepting chats status. You can use this to pass chats to experts in a particular field who only handle a particular set of cases.

Manual selectionLink icon

With Manual selection, the customers who started chat will be directed to the queue. All agents with the Accept chats status on will receive a notification about that event, and can pick up the customer from the queue and start a chat.

They can do that by selecting a customer from the queued chats list and clicking on Start chat button or by using a keyboard shortcut.
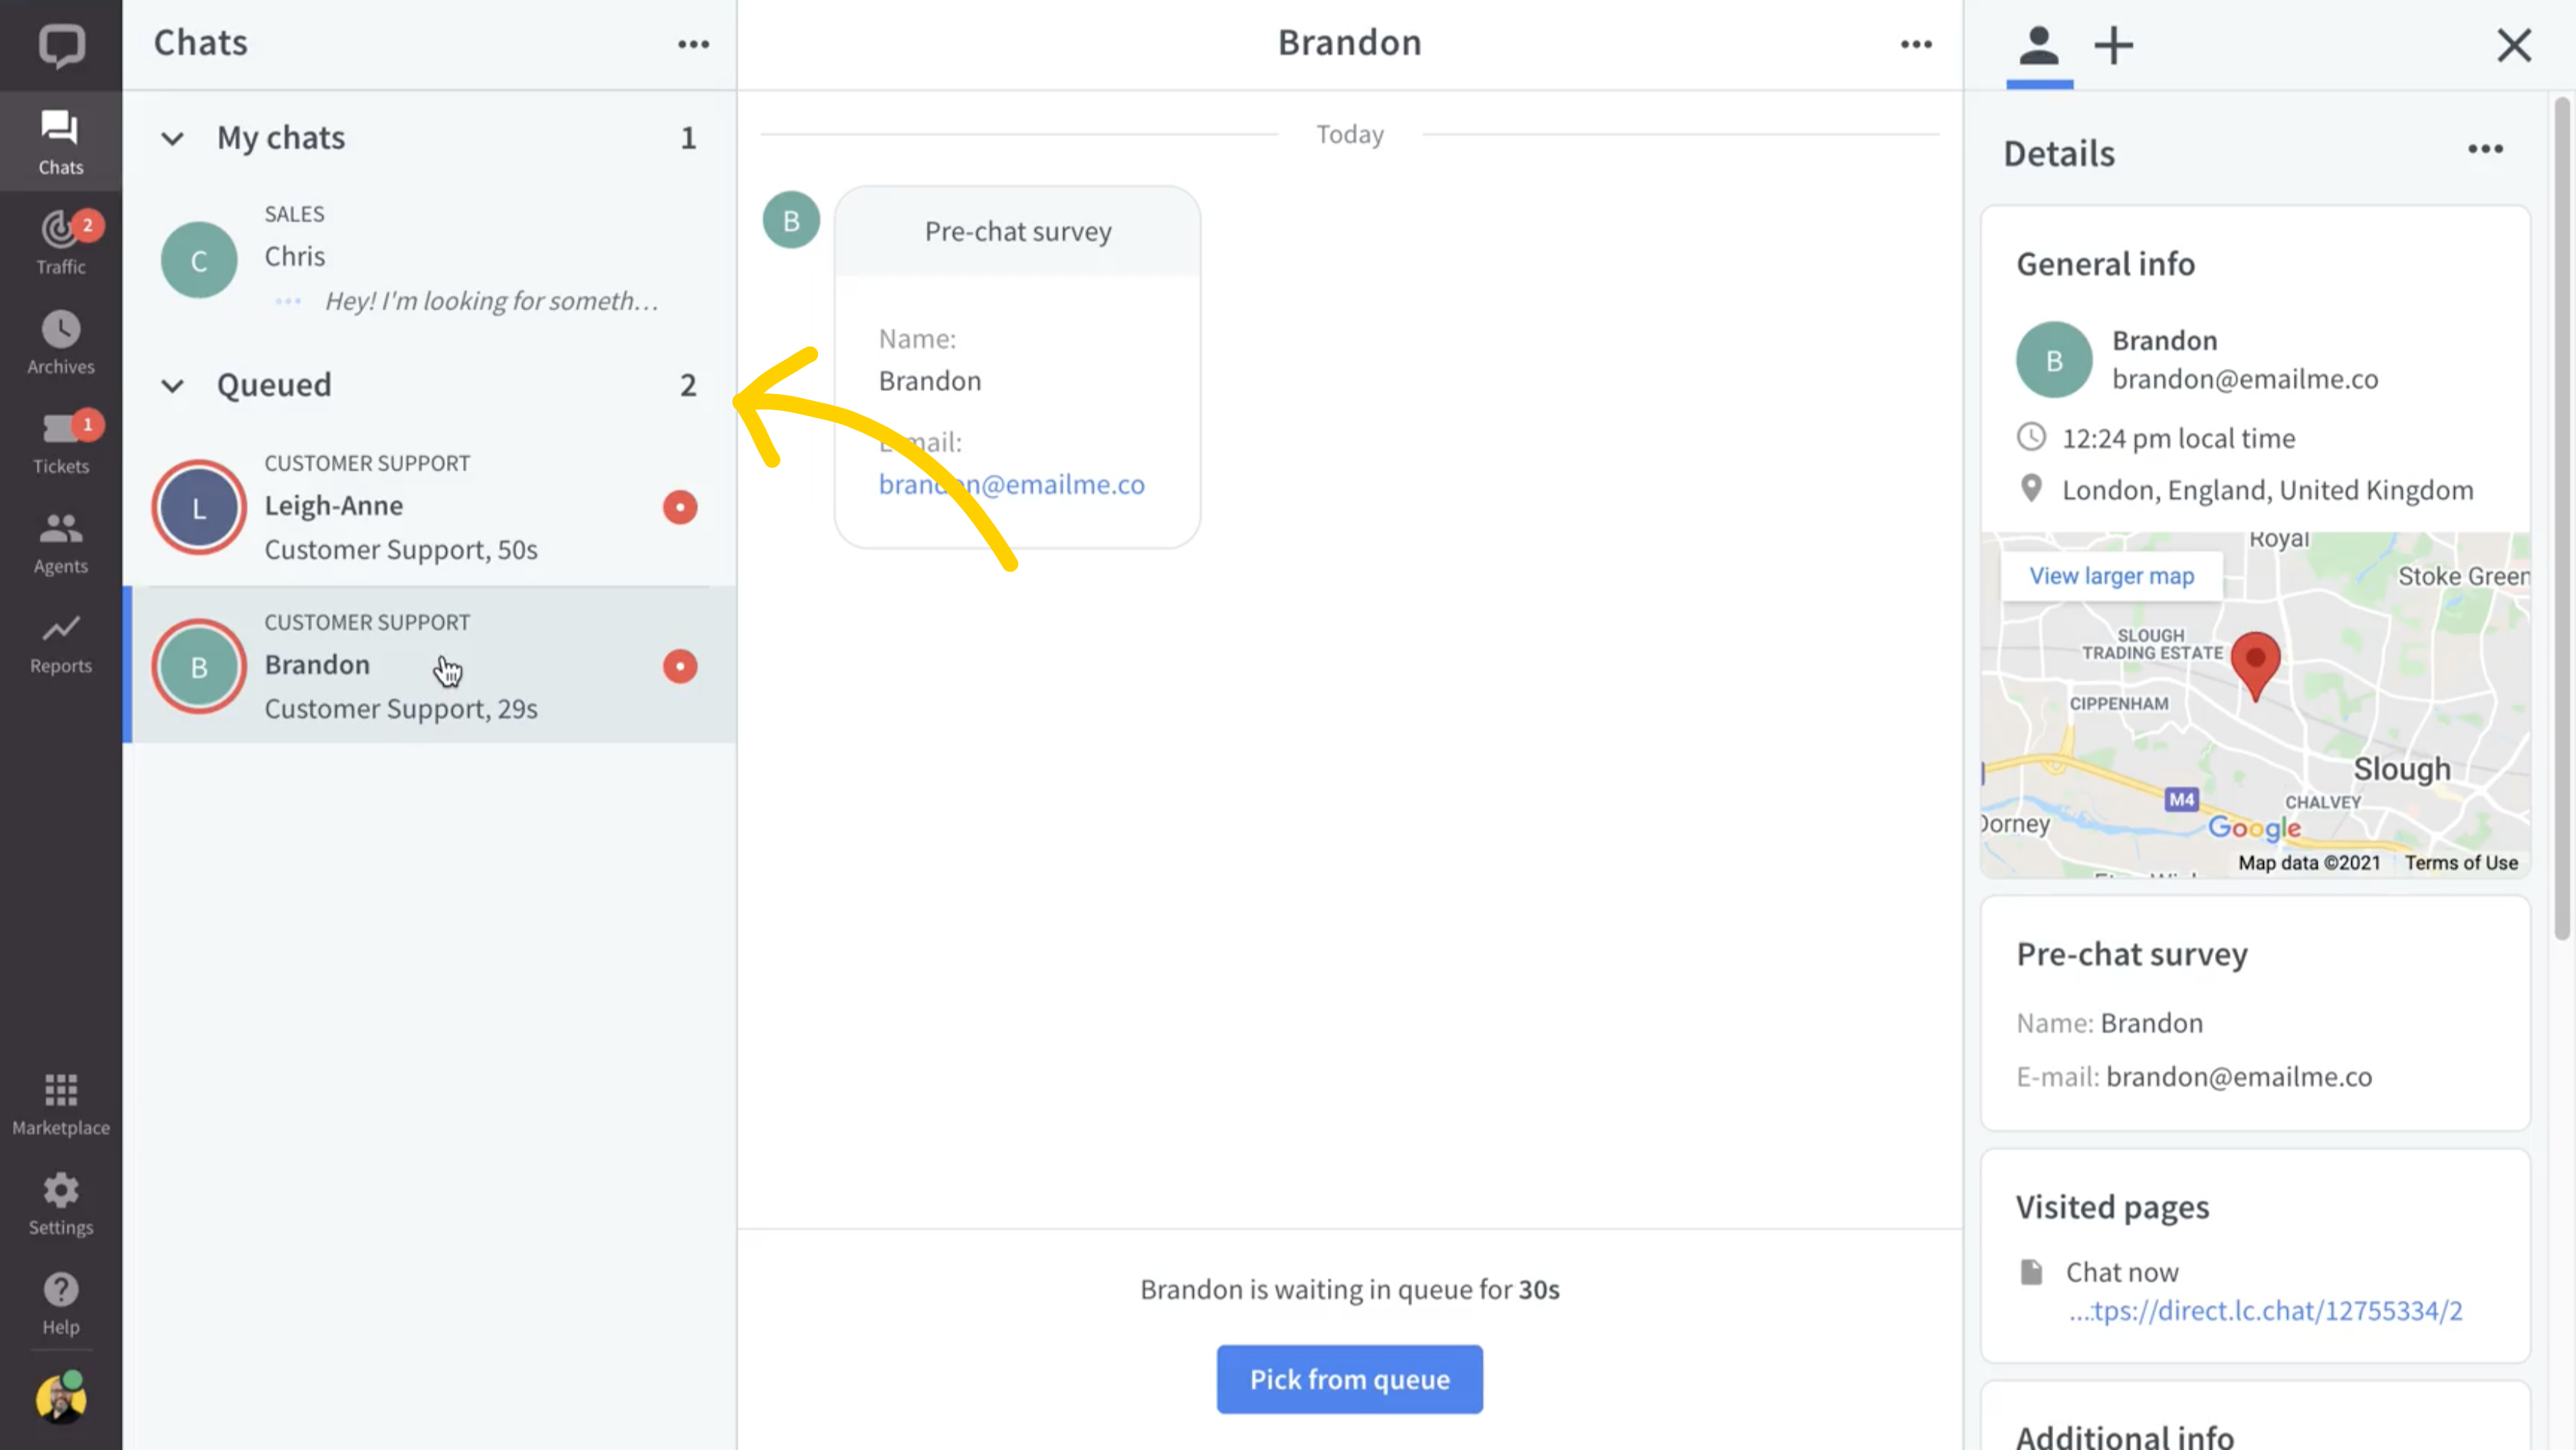
Start a chat from the queue

As soon as one of the agents picks up a chat, others won’t be able to do so.

Assignment between groupsLink icon

Chats are also distributed according to groups. Automatic assignment distributes chats from a specific group to agents from that group. With the Manual selection enabled, only agents from a particular group will receive a notification when a new chat for that group is available.

You can still transfer chats between various groups.

Chat assignment settingsLink icon

Follow the steps below to change the chat assignment settings:

1
Log in to LiveChat Agent app and go to Settings>Chat settings>Chat assignment.
2
From the drop-down menu, pick the group for which you want to set the Automatic assignment or Manual selection.

Automatic assignment is set as default, you only need to change the settings for groups that will work with Manual selection.
3
Select Automatic assignment or Manual selection.
4
Select Save changes.

Repeat for every group that you want to change the chat assignment for.

That’s it. From now on, the agents in the groups with Manual selection will pick customers from the queue, and the agents in the groups with Automatic assignment will receive chats automatically.

What about unassigned chats?Link icon

Unassigned chats are chats started by customers when your team is offline, if the availability of your Chat Widget is set to Always. Otherwise, they can be messages sent on Facebook Messenger, Apple Messages for Business, WhatsApp, or Twilio. Learn how to set Chat Widget availability to always.

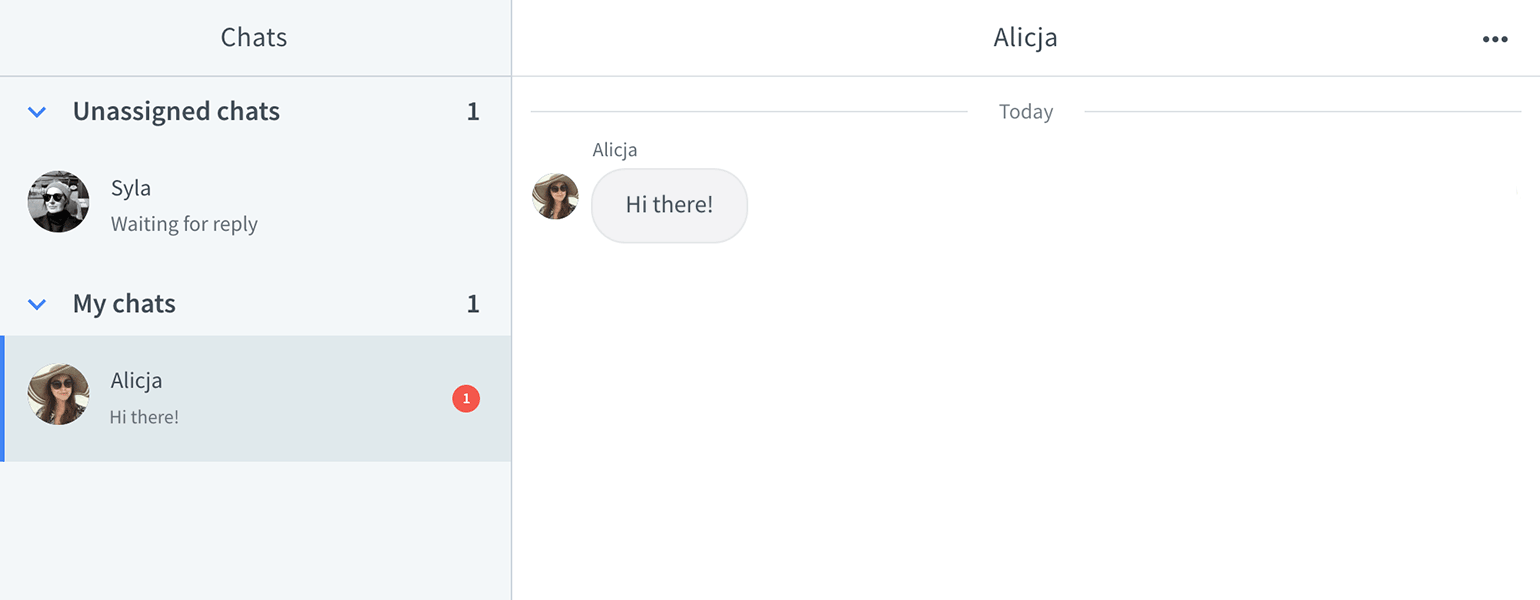
To assign a chat to yourself, select a chat from the list, and then select Assign to me. You don’t need to worry about missing out on customer messages when you are out of the office. With unassigned chats, you can reply any time you want right in the LiveChat app.

Reply to unassigned chatsLink icon

To reply, you need to:

  1. Go to Chats, and choose an unassigned chat from the list on the left.
  2. Click on Assign to me at the bottom of the page.
  3. Now, send your reply like you usually do.

Once you click on Assign to me, the chat will move to the My chats category on the list. From this moment, the unassigned chat acts like a regular chat.

Assign a chat to yourself in LiveChat

When a chat is unassigned, you only see the last thread. Once you assign it to yourself, you will see past threads as well.

More informationLink icon

A thread in an unassigned chat is archived after 10 minutes of inactivity when there are no agents accepting chats, and after the set inactivity timeout when agents are accepting chats. The chat gets a red border and stays pinned in the unassigned chats section.

When a thread has been archived, but the visitor sends another message, a new chat is created. The new chat has no red border, goes to the bottom of the list, and the inactivity timeout counter starts again. The old chat disappears to prevent having two chats with the same visitor.

Was this article helpful?

Got it!

Thanks for your feedback.

Thank you!

We’re happy to help.

RELATED ARTICLES

Add a chat button to your website

Read on and see how to modify the chat button. Remember – the better and more visible your chat button is, the more people will use it to start a chat.

Read the article

More chats with the eye-catcher

Attract yours visitors attention more effectively and offer your real-time help. Read on to learn how to setup attractive eye-catcher on your website.

Read the article

Start using LiveChat now!

Free 14-day trial Team plan features No credit card required

Still not convinced? Discover all LiveChat features

Discover text| products: